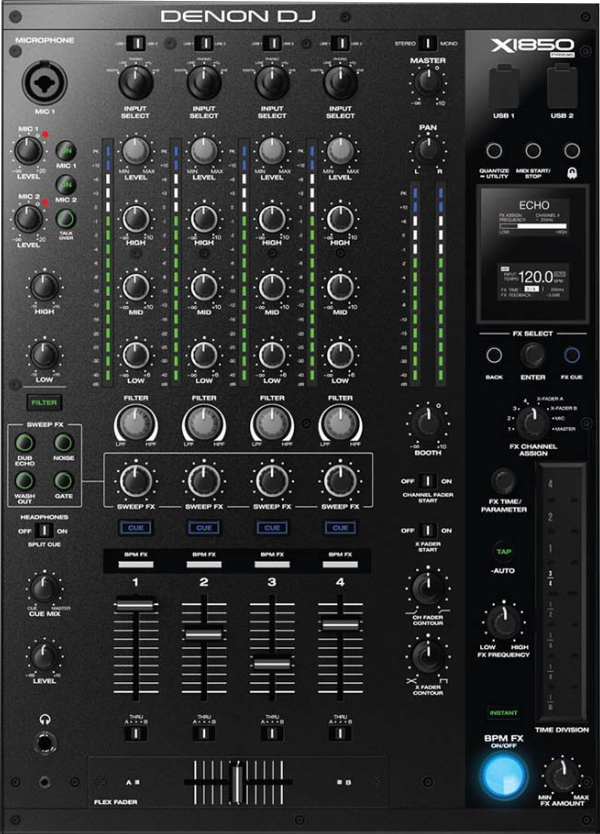
DENON DJ X1850 PRIME
Setup
Connections
- Connect your computer to USB 1 or USB 2 port at the top panel of the Denon DJ X1850
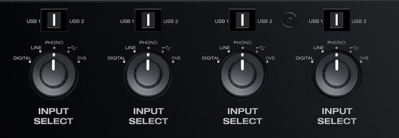
- Set the USB1/USB2 selectors at the top panel for all mixer channels, according to the USB 1/2 port you connected the Denon DJ X1850 with your computer.
- Set the INPUT SELECT selectors at the top panel for Channels 1 to 4 to USB position
- Connect your speakers/amplifier to the Master Outputs at the rear panel.
- Connect the X1850 with AC power using the provided cable and power on the unit
Drivers & Firmware
Firmware: (for both Windows and Mac OSX computers).
Make sure your device is updated to the latest firmware from https://www.denondj.com/downloads (if available)
Windows Drivers : Install the latest Denon Windows Drivers https://www.denondj.com/downloads
Mac OSX Drivers : No driver is required to be installed. The Mac OS will install the necessary drivers once you connect the X1850 to a USB port.
See Advanced Setup for further settings.
.
VirtualDJ 8 Setup
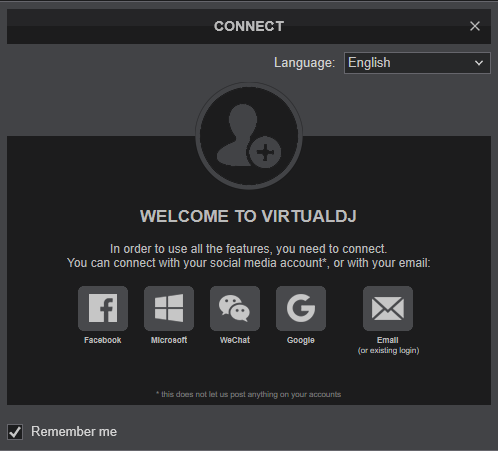
Once VirtualDJ is launched, a Login Window will appear. Login with your virtualdj.com account credentials.
A Pro Infinity or a Pro Subscription License is required to use the Denon DJ X1850. Without any of the above Licenses, the mixer will operate for 10 minutes each time you restart VirtualDJ.
http://www.virtualdj.com/buy/index.html
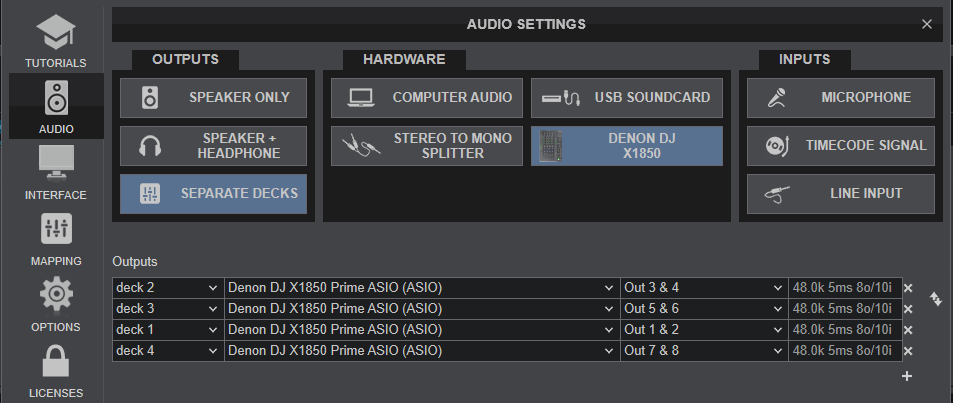
Click on the “X1850” button and VirtualDJ will automatically create and apply the pre-defined audio configuration using the built-in audio interface of the Denon DJ X1850
Click to OK.
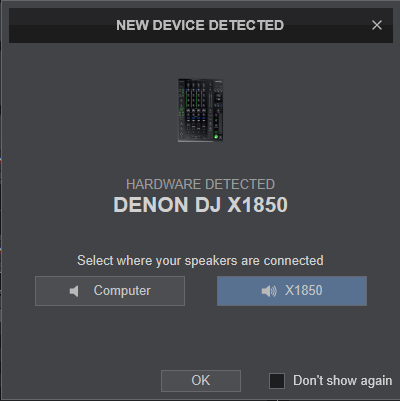
The unit is now ready to operate with VirtualDJ.
MIDI Operation
The unit should be visible in the CONTROLLERS tab of Config and the “factory default” available/selected from the Mappings drop-down list.
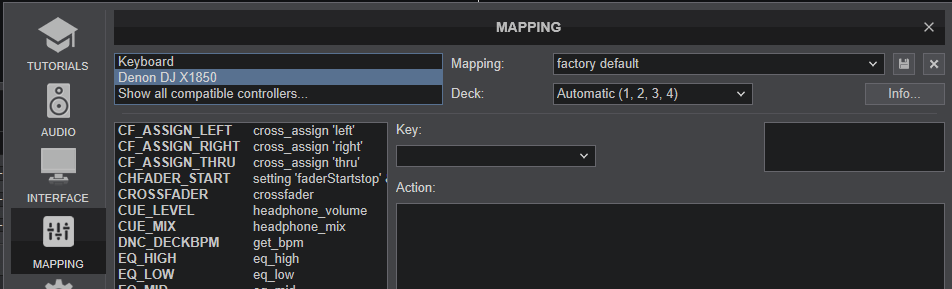
The factory default Mapping offers the functions described in this Manual, however those can be adjusted to your needs via VDJ Script actions.
Find more details at http://www.virtualdj.com/wiki/VDJ8script.html
AUDIO Setup
The unit has a pre-defined Audio setup and a special button in the AUDIO tab of Config to provide that. Alternative setups can be applied in the same window.
Timecode (DVS) configuration is not pre-configured (see DVS Support for more details).

If the audio routing is incorrect, please make sure the Mixer order and the Mixer Channel assignments are matched (see Advanced Setup for more details).
For further software settings please refer to the User Guide of VirtualDJ 8.
http://www.virtualdj.com/manuals/virtualdj8/index.html
CONTROLS
MIDI OPERATION
The Mixer section of the X1850 (Gain, Equalizer, Volume faders, Crossfader and Crossfader Assigns) is assigned with VirtualDJ mixer scripts, so their positions will be reflected to the skin of VirtualDJ. However, the audio mixing is performed from the X1850 itself, thus those controls from VirtualDJ will not alter the audio if changed from the skin (fake mixer mode).
The rest of the X1850 sections (Effects, Microphone, Headphones, Master/Booth etc) perform hardware operations are not assigned to any VirtualDJ script action, even though all of them send MIDI. If any of those elements is assigned using a custom mapping, keep in mind that their hardware operation will be still performed.
The operation of the Denon DJ X1850 is described in its official User Guide https://www.denondj.com/downloads
USB 1/2
The Denon DJ X1850 offers 2 USB ports at the top panel to connect to a computer and is equipped with 2 separate USB Audio interfaces, making the DJ changeover an easy task. In order the audio signal from a VirtualDJ deck to be routed to a X1850 Mixer Channel, just make sure it is set to the same USB (1 or 2) position from the top panel. When a computer is connected to USB 1 port, the mixer Channels that are set to USB 2 will be muted (and vice-versa)
INPUT SELECT
- When the Input Select switcher of a mixer Channel is set to DIGITAL the audio signal from Denon Engine (Ethernet connection) will be routed to this Mixer Channel and the audio from the assigned VirtualDJ deck will be muted
- When the Input Select switcher of a mixer Channel is set to LINE the audio signal from from the corresponding LINE Channel Input (rear panel) will be routed to this Mixer Channel and the audio from the assigned VirtualDJ deck will be muted
- When the Input Select switcher of a mixer Channel is set to PHONO the audio signal from from the corresponding PHONO Channel Input (rear panel) will be routed to this Mixer Channel and the audio from the assigned VirtualDJ deck will be muted
- When the Input Select switcher of a mixer Channel is set to USB the signal from the USB audio interface (a VirtualDJ deck) will be routed to this Mixer Channel. Use this setting if you want to route a VirtualDJ deck to a mixer channel and not using any Timecode Input
- When the Input Select switcher of a mixer Channel is set to DVS the signal from the USB audio interface (a VirtualDJ deck) will be routed to this Mixer Channel and at the same time Timecode (or Line In) Input will be automatically activated to the corresponding VirtualDJ deck, only in case Timecode (or Linein) inputs are added to the Audio setup of VirtualDJ.
Use this setting if you want to to route a VirtualDJ deck to a mixer channel and a Timecode Input is available (DVS System)
ADVANCED SETUP
RECORDING
No additional setting is required to record your mix with the Denon DJ X1850, as long as the record input (Channels 9,10) is included in the Audio Setup of VirtualDJ. The X1850 will send its pre-fader Master Output audio signal to VirtualDJ for recording, including all other inputs such as Microphones and Input Channels.
MIXER CHANNEL ORDER
By default VirtualDJ will assign and route its 4 Decks as followed (Mixer Order 3-1-2-4):
VirtualDJ Deck 3 -> Mixer Channel 1 (USB Audio channels 1,2)
VirtualDJ Deck 1 -> Mixer Channel 2 (USB Audio channels 3,4)
VirtualDJ Deck 2 -> Mixer Channel 3 (USB Audio channels 5,6)
VirtualDJ Deck 1 -> Mixer Channel 4 (USB Audio channels 3,4)

If you prefer to have a different mixer channel order - e.g. 1-2-3-4 to match the channel order of the device's silkscreen - you can change that from VirtualDJ Settings (mixerOrder setting).

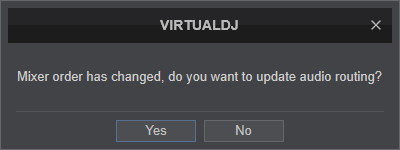
Every time the mixer channel order is changed, VirtualDJ will ask you if you want the Audio Setup (USB channels order) to follow the new Deck assignment. Click to Yes so that VirtualDJ to automatically update the Audio Setup for you.
Important Note !
For the above to work as expected, the USB Audio Interface Channels need to have the default assignment. By default the firmware of the Denon DJ X1850 has assigned Channels as followed:
CH1 ASSIGN to 1,2
CH2 ASSIGN to 3,4
CH3 ASSIGN to 5,6
CH4 ASSIGN to 7,8
Press the UTILITY button. Use the FX SELECT encoder to navigate to the ADVANCED AUDIO menu and push the FX SELECT. Navigate to USB AUDIO menu option and push to select. For each CH1 to CH4 ASSIGN, push to change the Output channels. Make sure the CH ASSIGNS are set as above.
Timecode (DVS)
VirtualDJ is offering DVS (Digital Vinyl System) support for the Denon DJ X1850. A Timecode Plus or Pro Infinity license is required. http://www.virtualdj.com/buy/index.html Up to 4 Timecode Inputs are available to control any software decks via Timecode CDs or Vinyls.
Connect your Timecode devices at the rear panel of the X1850 to the Inputs CH 1 to 4 and make sure the INPUT SELECT switchers at the top panel are set to DVS position.
Use the Utilities of the X1850 to set the respective USB Channels to LINE or PHONO depending on the connected DVS device.
Hold down UTILITY button->ADVANCED AUDIO->DVS SETUP->CH1 to CH4->Push and change to LINE or PHONO. Default X1850 settings are all CHs to LINE (Timecode CD).
Open the AUDIO tab of VirtualDJ Settings and click on the TIMECODE button. By default VirtualDJ will auto-create 4 Timecode Inputs as per the following image.

Click to APPLY.
Press PLAY on your timecode CD and/or Vinyl device and VirtualDJ will automatically detect your Timecode type and make the appropriate adjustments for best performance.
Open the TIMECODE tab of the VirtualDJ Settings and choose the CALIBRATE button if for any reason the signal is not detected (possibly due to reversed phase connections).
The above Timecode setup will properly assign Timecode inputs if the 3-1-2-4 default Mixer order is selected. If a different mixer order is selected, the Timecode Inputs channels in VirtualDJ Audio setup need to be manually changed.